Getting Started on The Chalk Circle
A Guide for Gyms
A gymnastics-only social network. Your athletes share their training, cheer on their teammates, and keep their parents in the loop. College recruiting is a bonus on top.
Questions at any point? Tory, (253) 234-7738, toryg@thechalkcircle.com
Part 1. Finish your gym setup (about 5 minutes)
Have these ready before you start:
- Your USAG club number
- Your gym address and phone number
- The first name, last name, email and phone number of each gym owner
- Sign in at app.thechalkcircle.com with the email and password you chose.
- Complete gym setup. After you sign in you land on the gym setup screen. It has three tabs across the top: Gym info, Owners and Coaches.
- Gym info. Enter your USAG club number, gym address and gym phone number, then tap Next. You can also add your gym logo here (JPG, PNG or WebP, 2 MB or smaller). The logo is optional and you can add it later in Settings.
- Owners. Choose how many owners your gym has, enter each owner's name, email and phone number, then tap Next.
- Coaches (optional). Tap Add a coach to add coaching staff contacts, or skip this and add them later.
- Tap Complete gym setup.
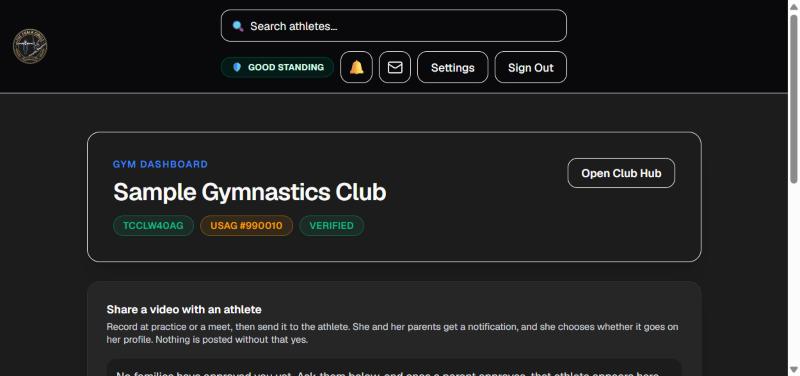
That's it. Your gym now has its own Chalk Circle ID (it starts with TCC) and a Verified badge, and your Club Hub is turned on. Tap Open Club Hub any time to manage your roster.
Part 2. Get your athletes on The Chalk Circle
There are two ways. Use either one, or both.
Option A. Families sign up on their own (no spreadsheet)
Best when you just want to announce it to your gym.
- Tell your families to go to app.thechalkcircle.com and tap Sign Up.
- The athlete (or her parent) chooses Athlete, creates an account and verifies her email.
- During her short setup she picks your gym by searching your gym name or your Chalk Circle ID.
- She then appears on your Club roster automatically.
Option B. Upload your roster (CSV)
Best when you want your whole team on at once. Athletes who come in this way arrive already verified, so there is no USAG card photo and no review. They are ready to post as soon as they claim their account.
- From your dashboard tap Open Club Hub.
- In the left menu choose CSV Roster Import.
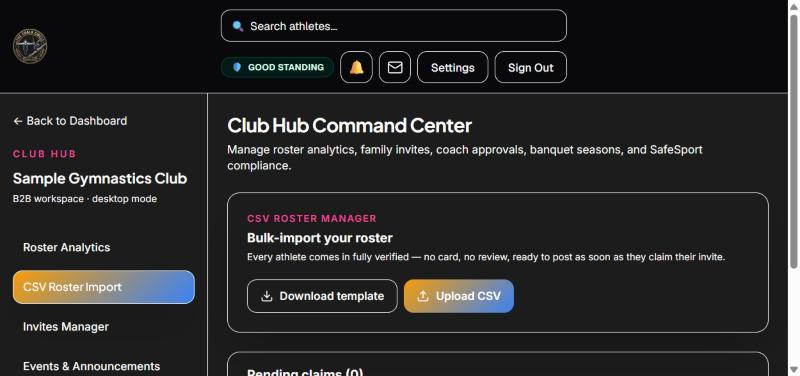
- Tap Download template. It is a spreadsheet with these columns, in this order. Keep the header row exactly as it is and add one athlete per row.
| USAG Number | First Name | Last Name | Gender | Level | State | Grad Year | |
|---|---|---|---|---|---|---|---|
| 123456 | Jane | Doe | Female | Level 8 | WA | 2028 | jane.doe@example.com |
- Gender: Female or Male.
- Level: Level 3 through Level 10 (written like "Level 8"), or for Xcel: Bronze, Silver, Gold, Platinum, Diamond or Sapphire.
- State: the two-letter code, such as WA.
- Grad Year: the year she graduates high school.
- Email: where her claim link is sent. For athletes under 18, use a parent or guardian's email.
- Save the file as a CSV and tap Upload CSV.
- You get a preview before anything is sent. It shows how many athletes will be invited, how many are updates, and any rows that need fixing, with the row number and the reason. If there are errors, fix your spreadsheet and upload it again.
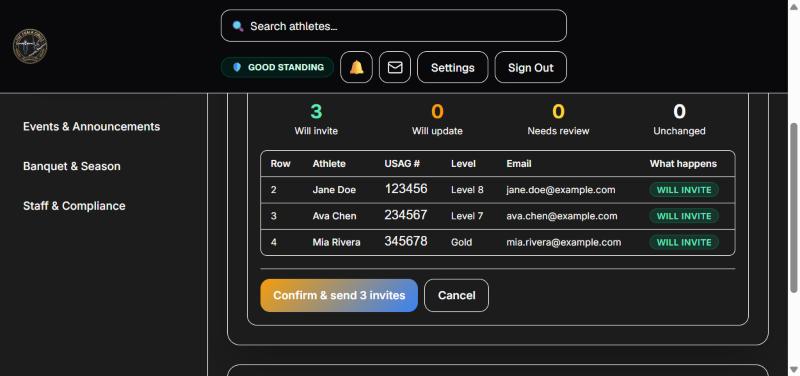
- Tap Confirm & send invites. Each athlete is emailed a message titled "(Your gym name) added you to The Chalk Circle" with a Claim your account button.
- Track who has claimed. Anyone who has not yet clicked appears under Pending claims, where you can resend or cancel an invite.
- If a row matches an account that already exists, it appears under Needs review. Nothing changes until you choose which version to keep.
What your athletes will see
- An email with a Claim your account button.
- A short claim page where she sets her password.
- Her profile, already linked to your gym, ready to share practice updates, photos and video, add teammates, and send messages.